Just a little walkthrough showing how I shaded a badge. I tested out a style of shading I haven't practiced in a year or two, but I thought the style would suit the badge rather well.
The character depicted is Majin copyrighted to BlueWolfCheetah on Deviantart. Art is mine though.
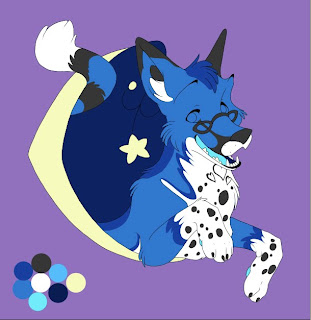
Just the base colors. Nothing really drastic or interesting as of yet. Typically I put the base colors of all the markings and such on the same layer, but this time I separated them out in order to do the sort of shading I wanted to.
Lighting is my weakness so I blocked out the direction the lighting is going to be coming from.

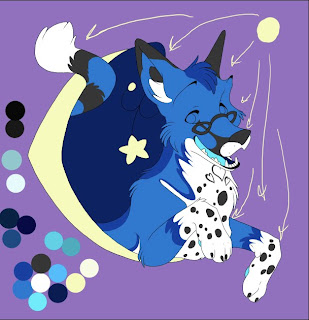
Working on the shading. I'm doing it gradient style. Used to be really popular and now that I can actually figure out the style, it's sort of fallen out of popularity a little bit. Shame...it is a beautiful style.
And shading all done. Basically the shading is done on layers of the colors/markings done. Not nearly as much room for mistakes as opposed to if I put the shading on a separate layer from the colors. However to get the right colors to blend together, putting them on the same layer works rather well. If you want to see how it's done, Kuitsuku's tutorial shows it really well:
.

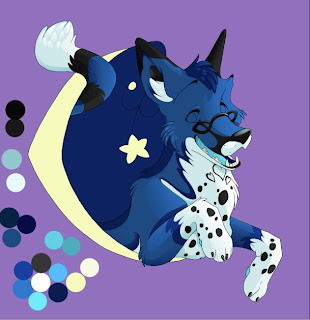
Add the background, backlighting, and shine. Had to change the background color so I could clearly see the glowing off the moon and stars so I could go back and tweek them later. Background's just a simple sky. Take two shades of blue. Use the gradient tool and add small stars (put the stars on a separate layer though). The stylized moon and stars...I put a lighter color inside and on a separate layer the glow is the same color as the "inner glow". Use an airbrush on low opacity to get the glow effect.

Eyes are always the last thing I color. Usually I go more detailed than this, but this is a bit more simplified version. The glass in her glasses was the very last detail one. It's a pale blue with a layer of white gradient shine over it. Bother layers are lowered in opacity to give the illusion of glass.
This is more of a walkthrough than a tutorial. However if you have any questions about the process, don't hesitate to ask. Most of this can possibly be covered in Kuitsuku's tutorial however.


